Are you constantly facing the Excel not responding or opening issue on your Windows 10 system? This frustrating problem can disrupt your work and cause delays. In this helpful guide, you will learn why Excel not responding Windows 10 and how to solve it in no time and with less effort.
To repair corrupt Excel file, we recommend this tool:
This software will prevent Excel workbook data such as BI data, financial reports & other analytical information from corruption and data loss. With this software you can rebuild corrupt Excel files and restore every single visual representation & dataset to its original, intact state in 3 easy steps:
- Try Excel File Repair Tool rated Excellent by Softpedia, Softonic & CNET.
- Select the corrupt Excel file (XLS, XLSX) & click Repair to initiate the repair process.
- Preview the repaired files and click Save File to save the files at desired location.
Why Excel Is Not Opening in Windows 10?
Understanding the root causes behind Excel’s unresponsiveness is crucial. It can be due to various reasons, including:
- Microsoft Excel has not been correctly upgraded or installed on your PC/laptop.
- Conflicts with other running apps.
- Excel files might have been corrupted.
- Excessive Add-ins.
- Enabled Hardware Graphic Acceleration or Protected View.
- Using an outdated Excel software.
After knowing the reasons behind the Excel issue, you can try the solutions mentioned in the next section.
Best Software to Fix Excel Not Working In Windows 10
As the manual methods are time-consuming and technical, it won’t cover more if you are not excellent in computer. To solve your Excel-related issue it is recommended to use the MS Excel Repair Tool to fix the Excel errors.
This Tool not only repairs all kinds of issues, errors, and corruption in Excel workbooks but also recovers deleted Excel data. It is very easy to use and can be used with both Windows as well as Mac operating systems. This tool supports every Excel version.
Steps to Utilize Excel Recovery Tool:


How to Fix Excel Not Responding Windows 10?
Follow the below methods to tackle Excel not working after Windows 10 update on your own.
Method 1- Close Unnecessary Running Apps
Closing unnecessary running apps can assist you in overcoming the situation. To do so, follow these steps:
- Press Ctrl + Shift + Esc keys simultaneously to open a Task Manager >> click “Processes” tab.
- Now, look for unnecessary running instances >> right-click on a particular app >> hit on “End task” to close it.

Method 2: Try Running Excel in Safe Mode
If your MS Excel is not responding after the update of Windows 10 or your spreadsheet is stuck, try to run Excel into safe mode. To do so follow the steps given below:
- Press Windows + R key
- Type excel.exe /safe
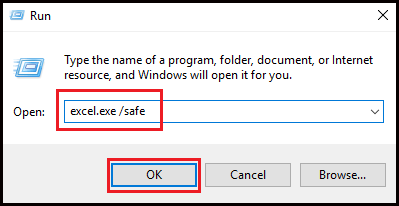
- Click OK to start the MS Excel program into Safe Mode.
- Now open the Excel file that is not responding
Also Read: Fill Handle Not Working in Excel? Here’s What You Need to Do!
Method 3: Try Disabling Add-Ins
Try disabling Add-Ins, if you are suffering regular slowdowns of MS Excel not responding, getting stuck, or freezing on your PC. Follow the steps to disable the add-ins:
- Press Windows + R key
- Type excel.exe /safe

- Click OK to start the MS Excel program
- Once in MS Excel, click on file icon on the top left corner of the screen and click on the Excel Options button

- Now, click on the Add-ins option in the side menu.
- Select the Excel Add-ins and click on go button to access the Add-Ins selection screen.
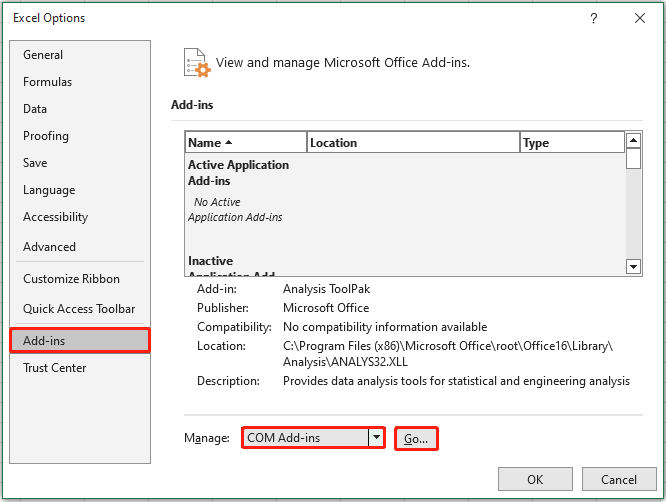
- On the Add-Ins screen, disable all the Add-Ins on your PC by uncheck the box next to the active Add-Ins

- Click OK to save the Settings
Method 4: Repair the Microsoft Office
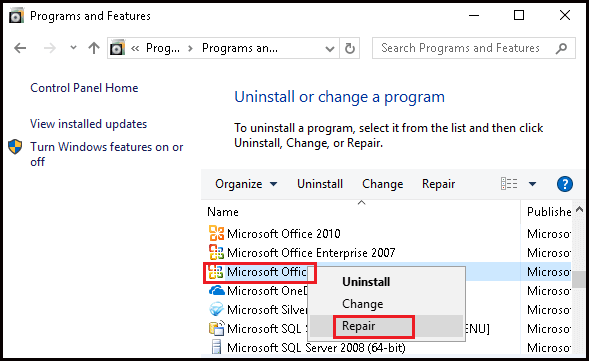
If the problem of MS Excel not working on Windows 10 PC/laptop, then it might be due to damaged or corrupt files. This issue can be resolved by using the Repair option of MS Office Program on your system. Follow the steps to do so:
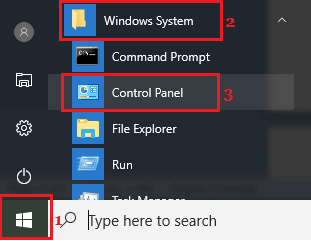
- Click on Windows icon, scroll down and click on the Windows System.
- Tap to the Control Panel option in Windows System Folder
- Hit the Program and Features in the control panel
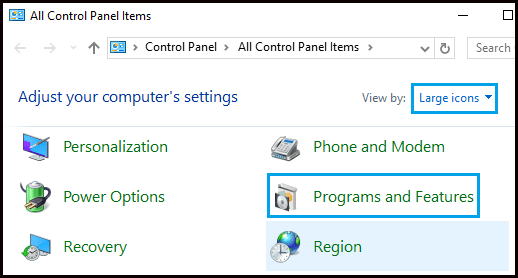
- Now, right-click on the MS Office and Click on Repair option in the menu
Method 5: Change the Printer Settings
Many times, Microsoft Excel can become unresponsive if unable to communicate with the default printer on your PC/Laptop. This generally happens when the printer is attached to your computer and is experiencing problems or the drivers are not updated.
You can change the default printer on your PC to Microsoft XPS Document Writer. Follow the steps to change the printer’s settings:
- Right-click on Start button
- Click on Device Manager option

- Next, click on the Action tab
- Click on the Devices and Printers option

- Now, right-click on the Microsoft XPS Document Writer, click on the Set as Default Printer option in the contextual menu
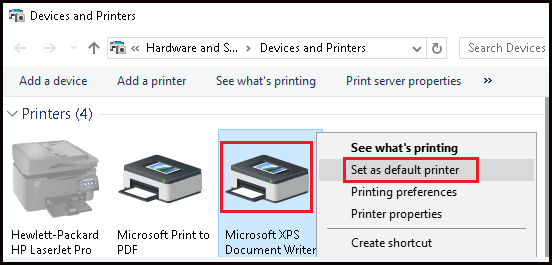
After setting the Microsoft XPS Document Writer as your default printer on your computer, open the MS Excel and check whether the issue is solved or not.
Also Read: Fix Filter Not Working in Excel Issue in Seconds!
Method 6: A particular MS Excel File is Not Responding
If your MS Excel is working fine on your PC and the issue arises on only some particular MS Excel files that are not responding. Then this issue can be solved by clearing the conditional formatting on that particular spreadsheet.
Follow the steps to perform the conditional formatting:
- Open the MS Excel File that is not working or gets freeze
- Click on the Home > Conditional Formatting > Clear Rules > Clear Rules from Entire Sheet
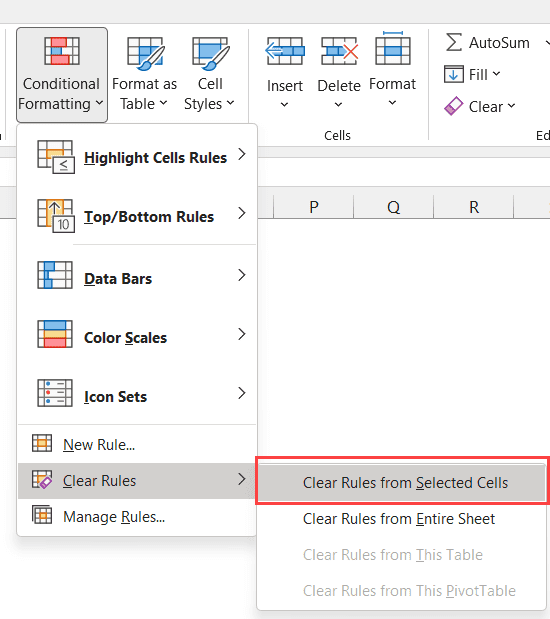
- This clears the Conditional Formatting from a particular sheet.
- Select the other Tabs from the bottom of the sheet and then clear the Conditional Formatting in those sheets also
- Now, save the Excel File with New Name, so that the original Excel File will also be on your PC.
After performing the above-mentioned steps if it fixes the problem of MS Excel not working or gets a freeze, or slow down on your system, then it is confirmed that the problem is caused due to Formatting in a particular sheet in a particular MS Excel File.
Method 7: Try Disabling Hardware Graphic Acceleration
Try disabling the Hardware Graphic Acceleration to Let MS Excel work after Windows 10 upgradation, follow the steps to do so:
- Open MS Excel
- Go to the File -> Options
- Click on the Advanced tab -> Display
- Check the box that says ‘Disable Hardware Graphic Acceleration’
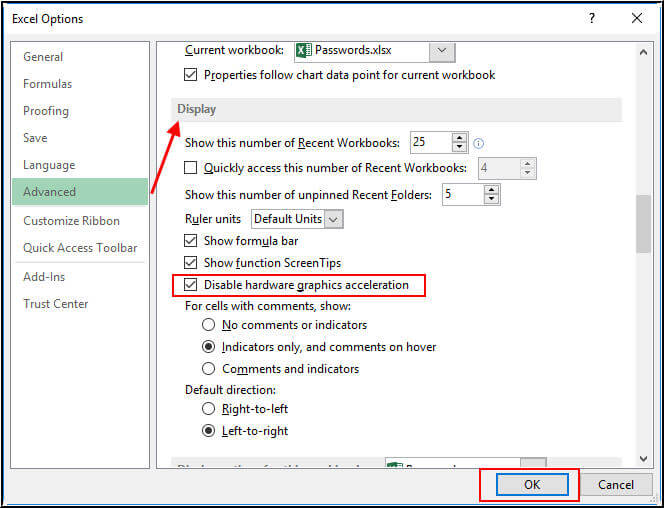
- Click OK and restart the MS Excel.
Method 8: Fix the issue with Protected View
Follow the steps to solve the issue of MS Excel not working after Windows 10 update with the help of protective view:
- Open MS Excel
- Go to the File ->Options
- Select the Trust Centre ->Trust Centre Settings
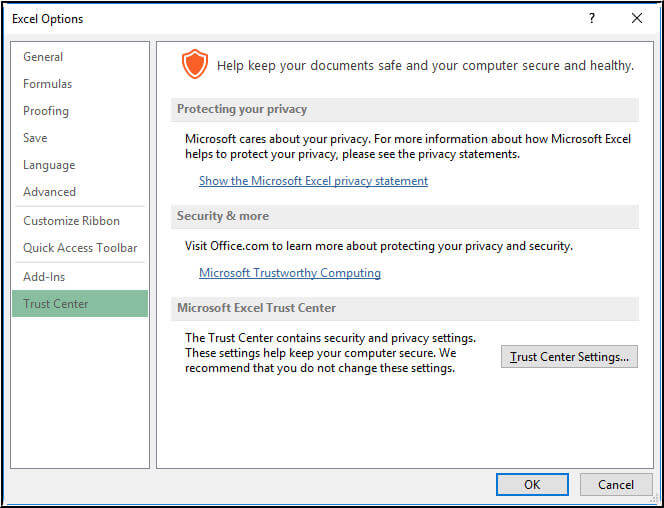
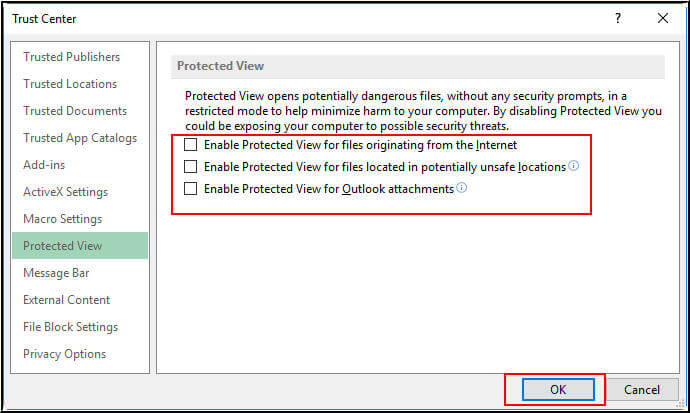
- Click on the Protected View
- Uncheck all the options
Also, change the below-given settings
- Under the Trust Centre settings,
- Click on the ‘File Block Settings’
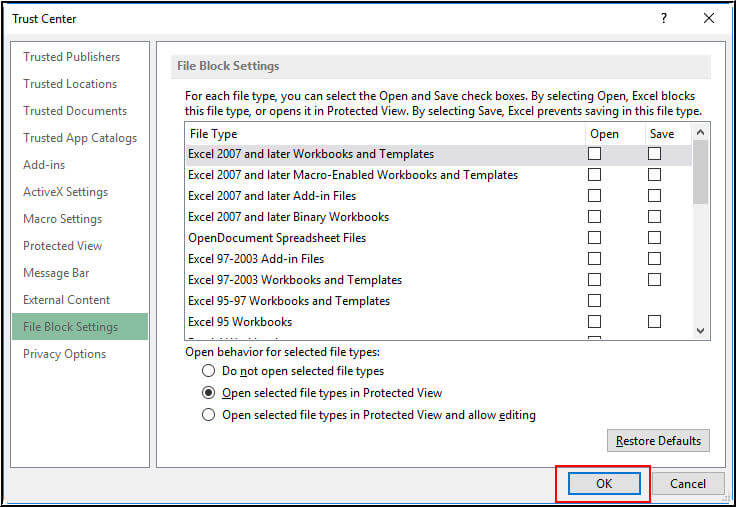
- Uncheck all the options.
Related FAQs:
How Do I Unfreeze Excel When Not Responding?
To unfreeze Excel when not responding or working, you have to:
- Open Excel in a Safe Mode.
- Install the latest software updates.
- Investigate possible issues using add-ins.
What To Do When Excel Is Not Responding and You Haven't Saved?
To recover a file that is not saved due to not responding problem, follow these steps:
- Open Excel >> Open Recent option > Recover Unsaved Workbooks.
- There could be a temporary copy of your file in a folder.
How Long Should I Wait When Excel Is Not Responding?
If your Excel application says that it is not responding, you should wait for at least 5 seconds.
Verdict Time
Excel not working in Windows 10 is a common hiccup that many users face. However, by implementing the techniques outlined in this post, you can fix the problem and seamless Excel usage. Additionally, if you’ve any queries, ask us on our Facebook & Twitter.

Priyanka Sahu
Priyanka is a content marketing expert. She writes tech blogs and has expertise in MS Office, Excel, and other tech subjects. Her distinctive art of presenting tech information in the easy-to-understand language is very impressive. When not writing, she loves unplanned travels.