Using Excel file regularly than here follows the quick tips on how to remove blank rows in Excel without destroying your data in Excel 2013, 2010 and earlier.
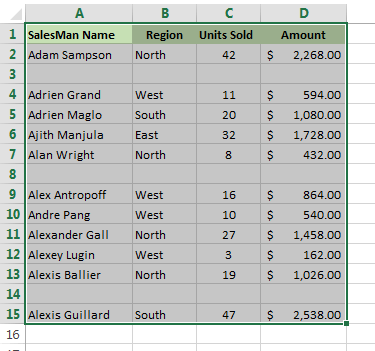
In Excel blank rows or cells in the datasheet is very annoying. However, while working on Excel sometimes we need to deliberately insert empty rows to make the report understandable and readable.
But, this can be very painful if you need to import spreadsheet to some other application like Microsoft Access. Or else the blank rows in the worksheets also prevents most built-in Excel table tools such as sort, remove duplicates, subtotals and many others to recognize your data range perfectly.
And due to this every time you need to specify the boundaries of your table manually, or else you start getting the wrong result and to detect and correct those errors you might take hours and hours.
Apart from these there might be various reasons why the blank rows infiltrate into your Excel sheets, some of them are – got an Excel workbook from another person, exporting data from the corporate database, or you remove data in unnecessary rows manually.
Anyways it doesn’t matter what are the reasons, here follow the quick and easy tips to remove blank rows in Excel.
Here we go:
Included Steps –
2: Use Excel Find Functionality
4: Use Excel Filter Functionality
5: Use Macros
How To Remove Blank Rows In Excel:
Step 1: Utilize Go To Special to Delete Blank Rows In Excel
Make use of the ‘Go To Special’ feature to find the blank rows in Excel so that you can delete them easily:
Follow the ways to do so:
- Open Excel sheet in which the blank rows needed to be deleted
- And, select your data range.
- Navigate to Home > Find & Select > Go To Special
Remove Blank Rows In Excel
- Now, in the Go To Special dialog box, click the ‘Blanks’ radio button and OK

- This will select all the blank cells immediately and you need to delete them

- Move to Home > Delete > Delete Sheet Rows without clicking anywhere on the sheet (otherwise your selection will be removed)

- And, the entire unfilled rows will be deleted.

Please Note: You need to be careful about one thing, if there are any missing values in any column they also get deleted and the displaced data can cause inconsistency.
*Bonus Tip: You can do the above step by making use of the keyboard, all you need to press the given keys after selecting the data:
Press: F5 Alt+S K {Enter} Ctrl – {Enter}
Step 2: Use Excel Find Functionality to Remove Excel Blank Rows
Now in this step to remove Excel blank rows make use of the Excel Find feature:
Follow the complete steps to do so:
- Select your data set > press Ctrl + F keys to open the Find and Replace dialog.
- Now, click the “Options” button > select “Values” from “Look in” And let the “Find What” text box blank > click “Find All”.

- After this “Find and Replace” dialog displays the entire blank cells.
- Click any one record > press Ctrl + A for selecting the entire blank cells.

- Next, close the “Find and Replace” dialog and without clicking anywhere else go to Home > Delete > Delete Rows.
- Doing this will delete the entire selected rows.
Other Helpful Article:
- How To Resolve ‘Excel Cannot Open The File ‘(Filename)’.Xlsx’ Error
- 10 Best Excel Formulas Tips Every Excel User Should Know
- FIX: Excel Saving File at Network Location Fails Error
- 8 Common Excel Error Messages that Irritates You The Most
Step 3: Use Key Column To Delete Empty Rows In Excel
The Key column works if there is a column in your table, as this helps to verify if it is an empty row or not (a key column).
Save the rows order, to sort the table by that column to move the blank rows to the bottom.
Follow the steps:
- Select whole table, from the 1st to the last row > press Ctrl + Home > press Ctrl + Shift + End.

- Now, add AutoFilter to the table and go to the Data tab > Filter

- And apply the filter to the “Cust #” column > click the arrow in the column header > uncheck the (Select All) check box > and scroll down to the end of the list > check the checkbox (Blanks) at the very bottom of the list > click OK.

- Next, select the entire filtered rows > press Ctrl + Home > hit the down-arrow key to go to the first data row > and press Ctrl + Shift + End.

- Right-click on any selected cell > select Delete row from the context menu or hit Ctrl + – (minus sign).
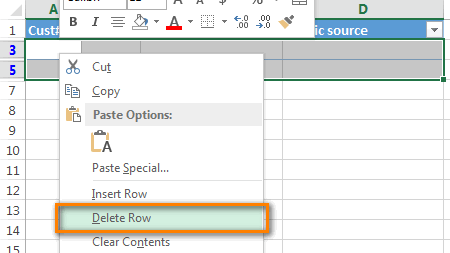
- Then click OK in the “Delete entire sheet row?” dialog box.

- And clear the applied filter: Go to Data tab > hit Clear

- This will delete blank rows completely.

Step 4: Utilize Excel Filter Functionality to eliminate blank rows in Excel
Make use of the Excel’s Auto Filter Functionality to remove Excel blank rows.
Follow the given steps to do so:
- Select the range from where you need to remove the blank rows.
- Go to Home > Sort and Filter > Filter or else press the Shift + Ctrl + L keys to apply a filter.

- Next select column > click filter drop down and uncheck the entire values excepting Blanks and click OK

- And with the entire blank rows selected > go to Home > Delete > Delete Rows. Lastly, remove the filter and you can see the blank rows are eliminated.

Step 5: Delete Blank Rows In Excel Macro:
This is the last step to delete blank rows in Excel macro. Well to make use of the macros for eliminating empty rows make use of the given code.
The code will internally use the same process of step 1.
Please note: Before running the macro code, select the range where you are trying to delete blank rows. And to run this code you need to enable Macros.
- Well, you can enable it in Excel go to File > Options > Trust Center > click Trust Center Settings.
- And in the Trust Center Settings window select the Macro Settings Select the security setting that you want to be applicable on macro execution.
The given steps are almost same for the Excel 2013 and earlier.
Follow the code:
- Sub DeleteBlankRows()
- Dim Rw As Range
- If CountA(Selection) = 0 Then
- MsgBox “No blank rows found”, vbOKOnly
- Exit Sub
- End If
- With Application
- .Calculation = xlCalculationManual
- .ScreenUpdating = False
- SpecialCells(xlCellTypeBlanks).Select
- ForEach Rw InRows
- If CountA(Selection.EntireRow) = 0 Then
- EntireRow.Delete
- End If
- NextRw
- .Calculation = xlCalculationAutomatic
- .ScreenUpdating = True
- End With
- MsgBox “Blank Rows Removed”
- End Sub
Well, these are the quick and easy ways to remove blank rows in Excel. However, if in the case while implementing the given steps or due to any other issue your Excel file gets corrupted or entire data gets deleted then make use of the MS Excel Repair Tool. To repair the corrupted Excel file and recover entire data in Excel file
Automatic Solution: MS Excel Repair Tool
Make use of the professional recommended MS Excel Repair Tool to fix common Excel errors. This is the best tool to repair all sort of issues, corruption, errors in Excel workbooks. This tool easily restores entire corrupt excel files including the charts, worksheet properties cell comments, and other important data. This is a unique tool to repair multiple excel files at one repair cycle. And also recovers the entire data in a preferred location. It is easy to use and compatible with both Windows as well as Mac operating system. This supports the entire Excel versions.
Steps to Utilize MS Excel Repair Tool:


Conclusion:
So, these are the quick ways how to remove blank rows in Excel. Make use of them and easily delete blank rows in Excel.
But if there are any other techniques for doing the same, then please let us know.
Good Luck….

Priyanka Sahu
Priyanka is a content marketing expert. She writes tech blogs and has expertise in MS Office, Excel, and other tech subjects. Her distinctive art of presenting tech information in the easy-to-understand language is very impressive. When not writing, she loves unplanned travels.