Very often users have to face a situation where their data in the MS Excel spreadsheet isn’t in the correct format for presentation or analysis. Thus, if you are in the same situation, you are not alone. Transposing data in the Excel can be the best solution to this issue. In this write-up, I will discuss the art of data transposition and other crucial info including the step-by-step methods on how to transpose data in Excel.
So, let’s get started…
To fix corrupted Excel files, we recommend this tool:
This software will prevent Excel workbook data such as BI data, financial reports & other analytical information from corruption and data loss. With this software you can rebuild corrupt Excel files and restore every single visual representation & dataset to its original, intact state in 3 easy steps:
- Try Excel File Repair Tool rated Excellent by Softpedia, Softonic & CNET.
- Select the corrupt Excel file (XLS, XLSX) & click Repair to initiate the repair process.
- Preview the repaired files and click Save File to save the files at desired location.
Quick Navigation:
What is Data Transposition in MS Excel?
Benefits of Data Transposition
How to Transpose Data in MS Excel?
- Using Transpose Excel Function
- Using Paste Special Feature
- Switch Columns and Rows in Excel with INDEX Function
- Use Power Query
- With Direct References
What is Data Transposition in MS Excel?
Transposing data in Excel is a useful way to switch the orientation of data in an array. This means the data in vertical portions are shifted to a horizontal format in the spreadsheet without disrupting any facts or figures. For a better understanding, check out the below image:
Consequently, in Microsoft Excel, there is a TRANSPOSE feature available that allows the users to rotate data from rows to columns or vice versa. It can save your precious time, effort and even make your data more organized.
Besides, transposing the Excel data process can be done with other useful techniques that are mentioned in one of the below sections.
Benefits of Data Transposition
Well, there are various advantages of transposing data:
- It simplifies the data analysis.
- It helps to make your spreadsheet data more organized & presentable.
- It also simplifies the formation of charts & graphs.
How to Transpose Data in Excel?
If you intend to transpose data in Excel manually, this would consume a massive time, all it requires is a few simple tricks to perform this process.
Method 1- Using Transpose Excel Function
As already said, the TRANSPOSE is an excellent function available in MS Excel that can assist you in transposing cells with less effort. Here are the steps to look forward & complete your job.
- Choose the range of cells that you intend to transpose
- Since Transpose is an array-based formula, it’s important to select the exact number of cells
- Assuming you have chosen 4×5 as per your table range, where 4 rows and 5 columns are highlighted. In the next step, you should choose 5×4 for setting the transposed data.
- Type the formula “=TRANSPOSE(A1:C1)”

- Press Ctrl+Shift+Enter to execute the formula
- This is done to ensure that the result would be an array of data instead of a sole cell
- Wait for the data to be transposed next up.
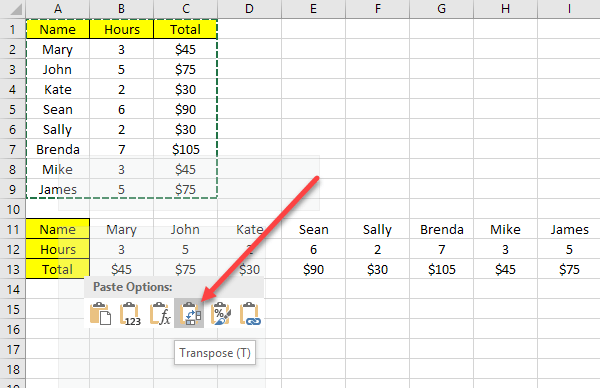
Method 2- How to Transpose Data in Excel Using Paste Special Feature
This feature allows you to make sure the format of the content is under your control. Thus, this feature can be used in copying the real content and even past the transposed one. Let’s check how it is done,
- First, choose the range you are looking to transpose.
- Copy the data range by pressing Copy.

- While doing so, traverse from the top-left of the target range of the same sheet
- Press Ctrl+Alt+V to access the same Paste Special option >> Check the Transpose option.
![]()
- Finally, Click OK.
Method 3- How to Switch Columns and Rows in Excel with INDEX Function
Another versatile function that can help you to get your job done is INDEX function. It is one of the Excel Lookup and Reference functions that returns a value or the reference to a value from within a table or range. You can even apply this feature to transpose Excel data.
Here’s how you can use this function:
- Select the range where you need the transposed data to appear.
- Next, type =INDEX(.
- Choose the information you need to transpose.
- After that, close a formula with ,,2,1) for row-to-column transposition & ,,1,2) for column-to-row transposition.

- Lastly, hit Enter to authorize the formula.
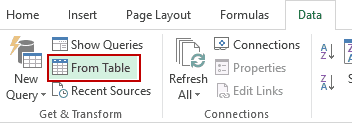
Method 4- Use Power Query
Using this method, it is possible to get repeated data from a similar source and use the technique to transpose. Here is how you transpose data in Excel, using Power Query,
- Firstly we assume you open data inside an Excel table. This can help you import the data into a power query and allow the process of transposing.
- Choose the range you want to transpose
- Go to the Data tab option
- On Get & Transform Data option
- Under the “From Table”, click to open the Query or Power Query Editor.
- Within the editor, visit the Transformation option and choose the Table Section. Follow this up with First Row as Headers. Follow this up with Use Headers as the First Row option.
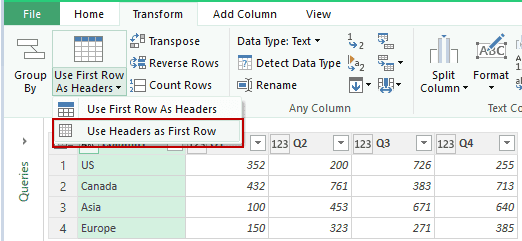
- Tap on the Transpose option and can be found in the same section
- This would transpose the selected Data range
- Choose the option “Use First Row as Headers”
- This ensures to make the first row of transposed data is a header
- Tap on the File tab and choose Close & Load

- Check if the entire process of transposing is successful or not. If not, try the next method.
Method 5- Transpose Excel Data with Direct References
You can also use direct references to transpose Excel data. This technique allows you to find & replace the reference with the data you need to display.
Follow the below steps to do so:
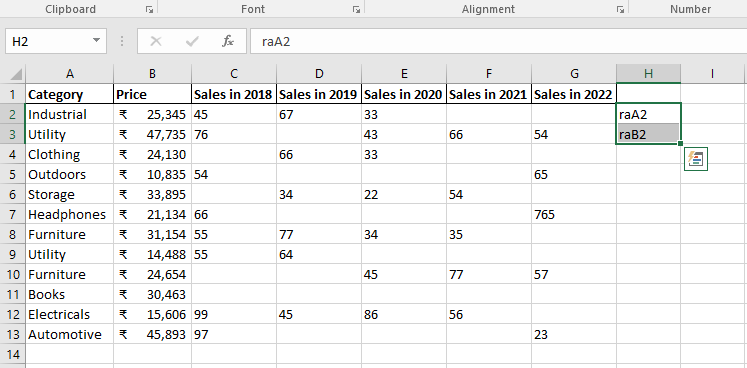
- Click on the empty cell, then type reference >> the location of the initial cell you need to transpose. In this situation, I’ll use the – raA2.
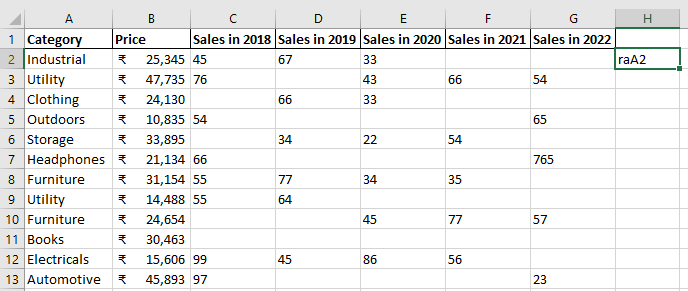
Just below raA2, you have to type raB2.
- Now, highlight both the cells & drag highlighted range out via clicking & dragging a green box at the bottom-right of your selection.
- After that, press Ctrl + H to open “Find and Replace.”. Then click on Replace option >> in a “Find what” field, you need to type a selected prefix, “ra” (without quotes), >> then “=” (without quotes) in a “Replace with” field.
- At last, click on “Replace all.”
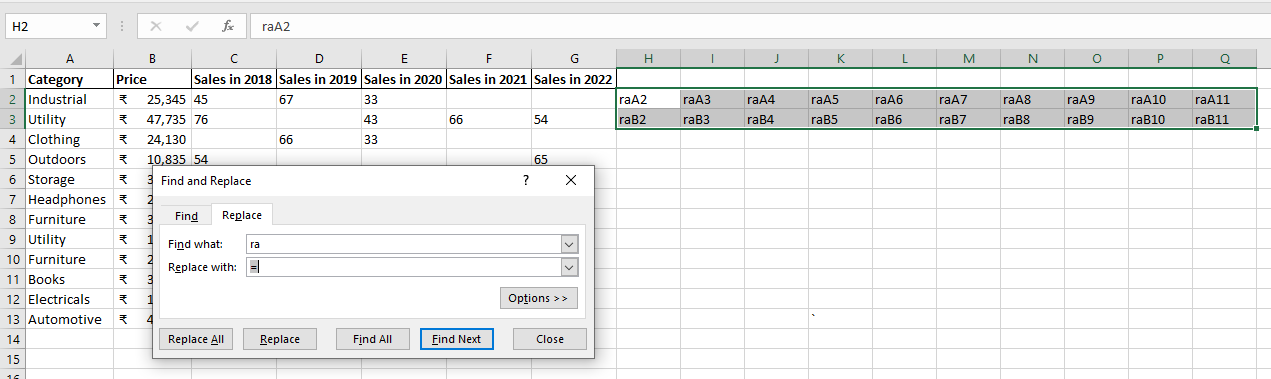
Now, the number of certain cells has the mandatory information.
Also Read: How To Use Excel ISERROR Function?
Related FAQs:
What Is the Main Purpose of Data Transposition in Excel?
The main purpose of data transposition in Excel is to rearrange the data from columns to rows or vice versa and make it more appropriate for analysis or presentation.
What Is the Shortcut for Transpose in Excel?
Ctrl + Alt + V is a shortcut for transpose in Excel.
Can I Undo a Data Transposition in Excel?
Yes, you can undo a data transposition in by copying original data & pasting it back into its original format.
Are There Any Limitations to Transposing Data in Excel?
Yes, there are certain limitations to transposing data in Excel. So, enormously large datasets might need alternative methods or tools for transposition.
How Do I Flip Columns and Rows in Excel?
You can flip columns and rows in Excel by selecting the data that you want to flip. Then, click Data tab >> From Table/Range option. This will simply launch the Power Query Editor, where you can check a Transpose option in order to flip the columns & rows.
Final Words
Now, with this brief guide, transposing Excel data is no longer a hectic task as you can easily rotate data from rows to columns or vice versa in no time.
I hope the article is useful for you and helps in solving your queries regarding data transposing.
Besides this, if you end up losing your Excel file data due to corruption issues, you can go with the recommended solution Excel repair tool. It is an advanced software that allows repairing corrupt or damaged Excel file data with 100% integrity.

Priyanka Sahu
Priyanka is a content marketing expert. She writes tech blogs and has expertise in MS Office, Excel, and other tech subjects. Her distinctive art of presenting tech information in the easy-to-understand language is very impressive. When not writing, she loves unplanned travels.