When any new data enter in the worksheet then the Excel table automatically expand by default. But sometime the situation may arise where Excel table doesn’t expand for new data. Do you know how you can fix this issue?
If not then don’t go anywhere as our today’s topic is specifically about how to make Excel table automatically expand. Besides this we will discuss how to deal with the problematic situations where Excel table doesn’t expand for new data.
To recover corrupted Excel file data, we recommend this tool:
This software will prevent Excel workbook data such as BI data, financial reports & other analytical information from corruption and data loss. With this software you can rebuild corrupt Excel files and restore every single visual representation & dataset to its original, intact state in 3 easy steps:
- Try Excel File Repair Tool rated Excellent by Softpedia, Softonic & CNET.
- Select the corrupt Excel file (XLS, XLSX) & click Repair to initiate the repair process.
- Preview the repaired files and click Save File to save the files at desired location.
How To Make Excel Table Automatically Expand?
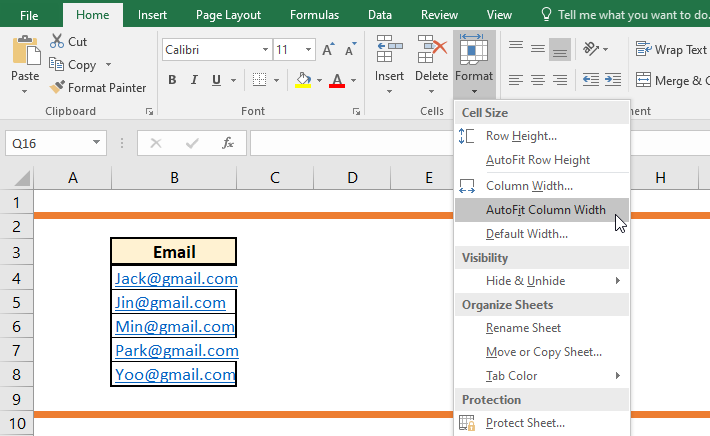
1# Change Column Width
To expand Excel table column width automatically; you need to perform the following steps:
- Hit on your Excel table and then go to the Layout.
- Now from the Cell Size group tap to the format tab.
- At last hit the AutoFit Column Width.
2# Change The Row Height
Here are the steps that to expand Excel tables row height.
- In order to set row height by assign by measurement size. Make a click over the row which you need to resize.
- Go to the Layout> Cell Size group> format.
- In the opened box of Table Row Height, you have to assign the size you want to keep it.

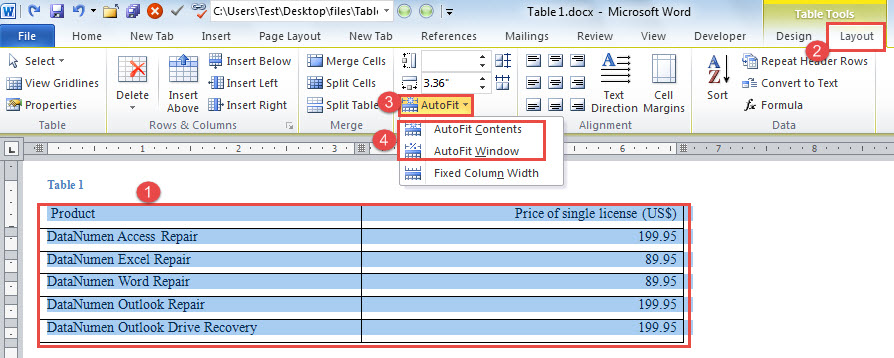
3# Resize Excel Table Automatically With Autofit
You can automatically adjust Excel table to easily fit with your content size by making use of the AutoFit option.
- Choose your Excel table.
- Go to the Layout>Cell Size group>AutoFit option.
- Choose anyone of the following.
- Hit the AutoFit Contents option to adjust the column width automatically.
- Choose the AutoFit Window option if you want to adjust the table width automatically.
4# Add Or Change The Space Inside The Table
If you needs to add space inside your table then you can make adjustment in the cell spacing or margins.
1. Click on the Excel table.
2. On the Layout> Alignment group>Cell Margins.
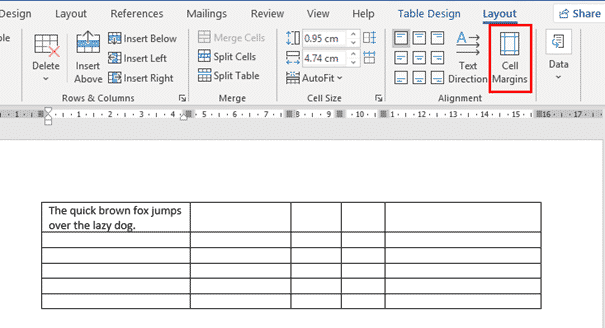
3. This will open the Table Options dialog box from here you have to choose any of the following option.
- Within the Default cell margins, assign the size you need on your table from Bottom, Left, Top, or to the Right margins.

- Within the Default cell spacing option, tick the check box of Allow spacing between cells. After that enter the measurement as per your need.

Note: all these setting changes is applicable only for the specific table in which you are applying it.
Why Excel Table Doesn’t Expand For New Data?
The problem of Excel table doesn’t expand for new data arises due to following reasons:
- Firstly when the AutoCorrect setting goes wrong.
- Secondly when the Autofit Option in Excel is turned off.
How To Fix Excel Table Doesn’t Expand Automatically Issue?
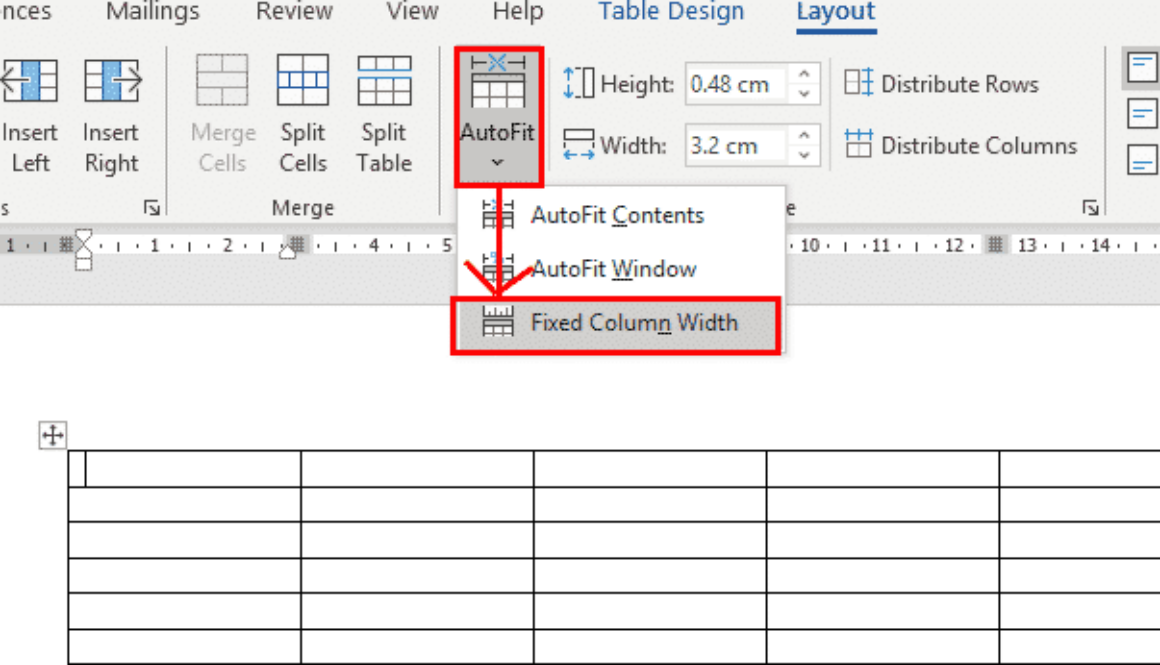
1#Disabled Autofit Option
As the main function of the AutoFit function is to automatically make adjustment of the table size as per the data input. Behind this Excel table doesn’t expand issue the reason can be the disabled autofit option.
- Choose your Excel table.
- Go to the Layout> Cell Size group> AutoFit.
- Hit the Fixed Column Width option.
2# Change The Autocorrect Settings
NOTE:
Making changes in the autocorrect settings put effects on all the workbooks which is being opened in the Excel application.
To make Excel table automatically expand follow the below mentioned steps:
- From the Excel Ribbon hit the File.
- Tap the Options.
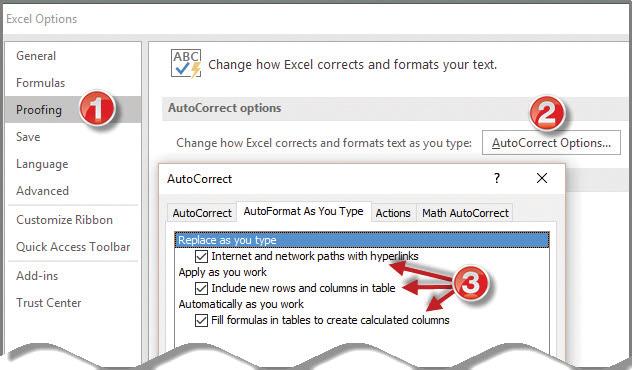
- In the opened dialog box of Excel Options, hit the Proofing.
- Hit the AutoCorrect options.
- Now go to the AutoFormat As You Type.
- Hit the “Include new rows and columns in table” and “Fill formulas in tables to create calculated columns”.
- Tap to the OK button.
What Is The Advantage Of A Table In Excel?
Excel Table feature helps to convert wide range of worksheet’s data into one defined table which formerly counted as individual columns/rows. After converting the data range into a table, Excel count each individual cells of the table like a single object having the functionality that doesn’t exist in the typical data range.
Following are the advantages of using tables in Excel:
- Excel tables are by default enabled with the option of Filter drop-down headers. This makes data sorting and filtering very easy.
- With this you can easily add a Total row using different types of aggregate functions.
- Excel table allows you to add special formatting in it independent to the rest of Excel spreadsheets.
- If someone is using it for data modelling purpose then it automatically gets expanded for new data.
Also Read: How to Automate Repetitive Tasks in Excel?
How To Convert Data Range To Excel Table And Vice Versa?
Converting Data Range To Excel Table
For converting the range of data to Excel table, here are the following steps that you need to follow:
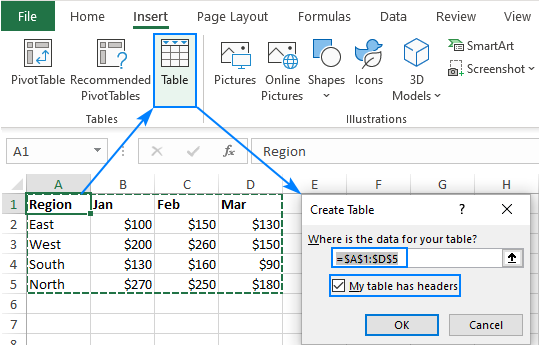
- Select the cell range having the data which you want to insert in your Excel table.
- Go to the Insert tab from the Excel ribbon and hit the Table This will open the dialog box of Create Table.
- From this Create Table opened window, you need to verify the table range and make the first row of the range as header row.
- Hit the OK option to apply all the done changes.
After doing this conversion you will observe that an autofilter drop-downs starts appearing over the header rows. This Excel table can be used like a source for Pivot Tables, list boxes, charts etc. or for any object which uses data range.
When the data get added into the table, Excel automatically expands the table range and joins this newly added data range into your linked object.
So in this way any Pivot Table or chart linked with the Excel table automatically updates with the new data without going through any manual procedure.
Convert Excel Table Back To Data Range
If in case you needs to convert Excel table data back to range, then follow down these steps:
- Put the cursor on any cell within your Excel table and choose the Table Tools> Design.
- From the tools group hit the option of Convert to Range.

- Now you will get a confirmation message box, in which you have to select the YES option.
Note: Table features don’t exist once you convert Excel table back to range data format. For instance, now the row header doesn’t have any arrow of sorting and filtering. Also the structured references which are used in the formulas will get back into the casual cell references format.
Conclusion:
Building data models in Excel using table is the best way to maintain your data but it becomes a challenging task with the passage of time. It’s because the table grows in records count with the addition of new data. At that time it gets necessary to expand Excel table.
So by using the above manual steps you can easy make Excel table automatically expand. If in case you are also dealing with the same Excel table doesn’t expand issue then try the given fixes.

Priyanka Sahu
Priyanka is a content marketing expert. She writes tech blogs and has expertise in MS Office, Excel, and other tech subjects. Her distinctive art of presenting tech information in the easy-to-understand language is very impressive. When not writing, she loves unplanned travels.